
As I get more into crafting, I have started setting up a small corner of my bedroom as my crafting area. I’ve purchased a whole bunch of things for area, which you’ll see in other posts.
Two things I really need is something to store my glue gun in when it is still warm and something for my washi tape. I decided to tackle the glue gun first.
I looked on Pinterest and YouTube to see what I could DIY. I found one I really liked that used items I could buy from the Dollar Tree. One of the required items was a plastic napkin holder. However, no matter how many times I went looking for it, I could never find the napkin holder. I found all the other items but not the napkin holder. So, I went looking for another idea. I found it on coupontoprovide’s YouTube station. I already had most of the items, the only thing I’d need from the Dollar Tree was a picture frame.
Well, today I finally got around to making the holder.
I pulled together everything I needed:
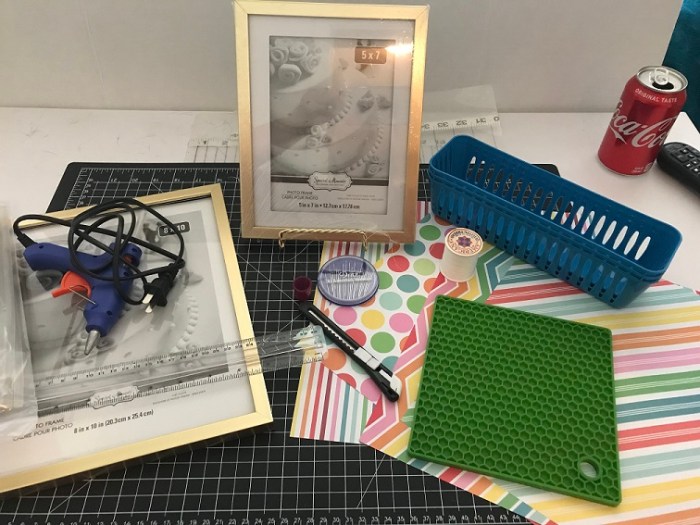
- Picture frames – I show two here. The 5×7 is for the glue gun storage and the 8×10 is for washi tape storage.
According to couponstoprovide’s directions, I was supposed to use a 3×5 frame but I wanted something a little larger so I could see more of background since that is how it will coordinate washi tape storage. - Ruler
- Needles and thread
- Silicon pot holder, green
- Glue gun and glue sticks
- Craft paper – I pulled a few options. I wanted the background for the glue gun and washi tap storage options to match. I have the green pot holder and blue baskets for the washi tape.
The first thing I did was take apart the picture frame. I set aside the glass because I won’t be using it in this project but I want to save it to use in another project sometime in the future (maybe).

I used the back piece to measure the background paper. I decided on the multicolored chevron. I used the utility knife so the cuts were very clean.
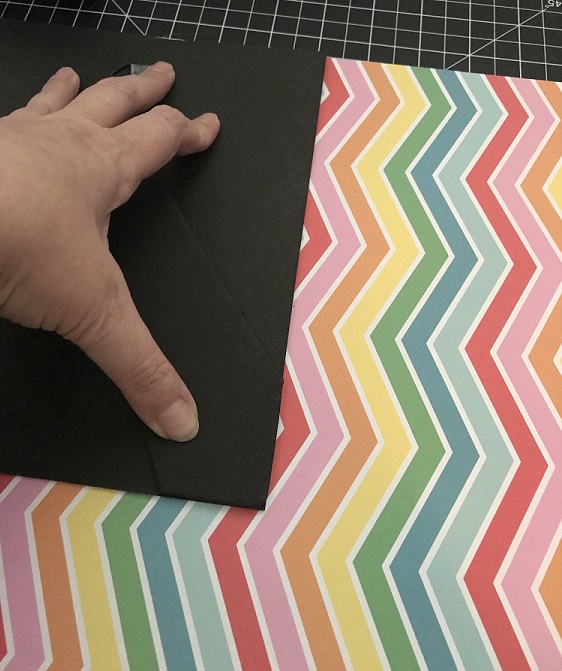
I put double-sided tape all over the back of the paper to adhere it to the back of the picture frame.


Now I needed work on the two pockets. First, I needed to cut the silicon potholder in half. I found the middle by using my mat. Then I used my ruler to make sure the cut was straight and made the cut using the utility knife.

Now, I needed to make each half into a pocket. I started by rolling the first half into a tube and sewing the two sides together.


Then, I sewed the bottom together.


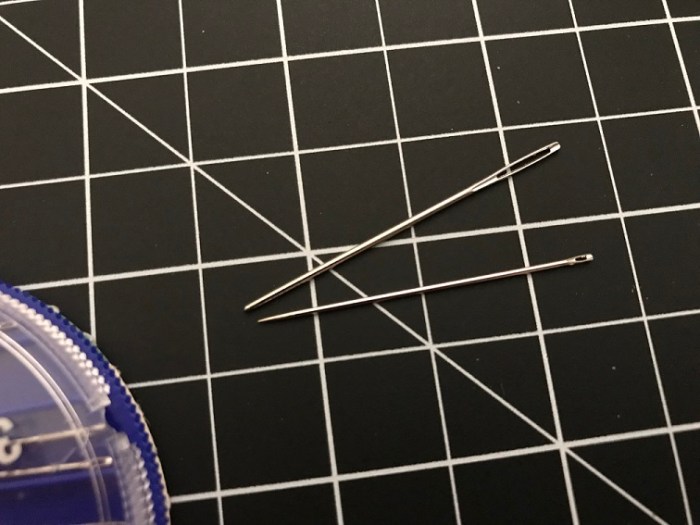
This was actually easier than I thought it would be. I just had to find the right needle and a pretty strong thread. The first needle I picked was nice and heavy but it had a blunt point, which I figured would be difficult to push through the silicone and would definitely not make it through the back of the picture frame. So, I found another one that had a nice sharp point and heavy enough.
I finished the second pocket. I placed both pockets on the backing to figure out where to place them. So far I’m liking what I think this will look like.


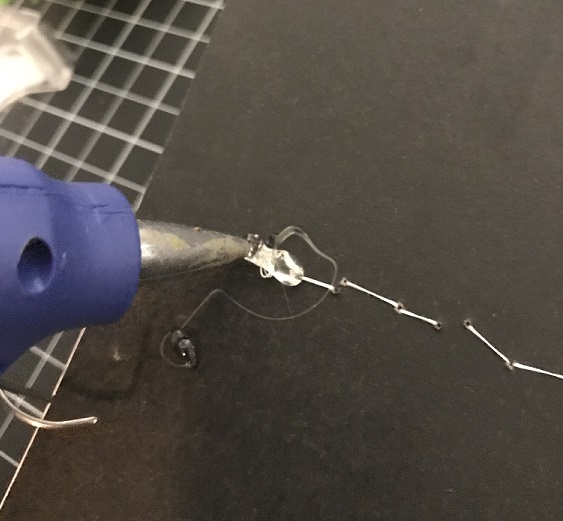
To sew through the back of the picture frame, I pushed the needle through the front out the back, but I wanted the thread knot to be in the back, so after I made the hole, I withdrew the needle and used the hole to push it through from the back. It was pretty each to push the needle through from the front to back but much harder from back to front, mostly because I couldn’t see where it was going to come out. I ended up making the holes from the front when I needed to come through from the back. After I got the top sewn down, I repeated the process with the bottom of the packet.

After I repeated the whole thing for the 2nd pocket, I put some hot glue on the back to secure the knots.
Then I had to put the frame back together. I put the back in the frame and ran a line of glue around the edge to make sure it didn’t fall out.

Then I put in the cardboard and matting from the front to add bulk for the metal closures. I also ran another bead of glue around the edge of the cardboard piece for even more security and put the piece of matting over that to cover all the messy stuff. And finally, I pushed the little metal brackets back down to hold everything in.


So, what do you think of the final product?
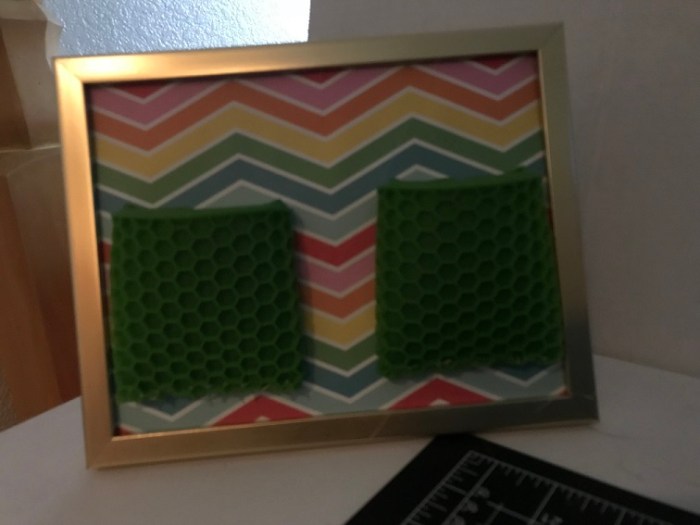
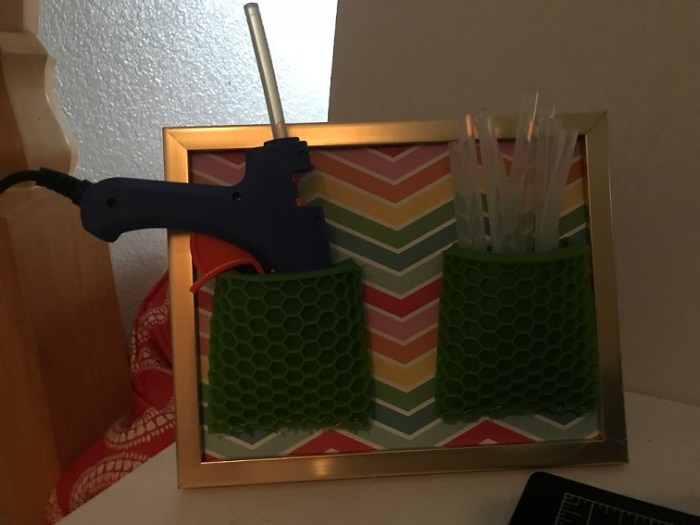
I really like it. It holds a nice supply of glue sticks and my glue gun very nicely. The really nice thing is that I can put the glue gun in the pocket while it is still warm since it is silicone. And it any glue drips in it, I can just scope it out once it is cool. And I think it looks really nice on the corner of my desk (close to the outlet).

I have noticed you don’t monetize vpdairies.blog, don’t waste your traffic, you can earn additional cash every month with
new monetization method. This is the best adsense alternative for
any type of website (they approve all websites), for
more info simply search in gooogle: murgrabia’s tools
LikeLike